Image and Content Fader:
The S5 Image and Content Fader is shown on the homepage in the custom_1 position. You can enter any custom HTML into each slide. Simply enter the images and into the default fields in the back end of the module. This demo uses 1775x1016 images, but you can use any image size; just make sure they are all the same size. Features like size, zoom, slide effects, and others are controlled in the module's back end. For setup instructions for please visit: http://www.shape5.com/documentation/Joomla/Extensions/S5-Image-and-Content-Fader

Image Slide 1 Text:
<span class="s5_iacf_line">
<span class="s5_iacf_smalltitle">Experience</span>
<span class="s5_iacf_bigtext">The WildLife in Person </span>
<span class="s5_iacf_smalltext">
Immerse yourself in the amazing atmosphere of a national park with animals on the endangered species list. This theme is great for any type of website that has a specific attraction that you need to show case.</span>
<br />
<a style="float:none" class="readon" href="index.php/extensions/s5-image-and-content-fader">Read More</a>
</span>
Image Slide 2 Text:
<span class="s5_iacf_bigtext">The WildLife in Person </span>
Immerse yourself in the amazing atmosphere of a national park with animals on the endangered species list. This theme is great for any type of website that has a specific attraction that you need to show case.
<br />
<a style="float:none" class="readon" href="index.php/extensions/s5-image-and-content-fader">Read More</a>
<a style="float:none" class="readon readon_white" href="index.php/extensions/s5-image-and-content-fader">See Features</a>
What to Expect
There is a custom HTML module that is published to the top_row1_1 position with a module title of "-titleleft". The background image is controlled under the Main/Layout tab in the template configuration. There is a second custom HTML published to the top_row1_2 position. Scroll reveal must be enabled for the transition effect in the top_row1_2 position.
What to expect text:
<span class="firstcharacter2">N</span>am sit amet elit a velit hendrerit efficitur eleifend eget dui. Aenean pretium nibh sapien, ut ullamcorper felis convallis nec. Ut posuere quis justo sed commodo. Sed luctus quam quis nisi porta, sed dictum justo porttitor. Vivamus porta mollis pellentesque. Quisque gravida mi nec ligula interdum efficitur. Curabitur posuere nisi justo, vel malesuada elit euismod nec. Suspendisse at dui et ex convallis eleifend. Etiam volutpat ultrices ex, at pharetra nibh pretium quis. Duis sem lorem, pretium ut laoreet vel, finibus at nunc. <br /><br /> <a class="readon">Read more</a> <a class="s5mb readon darkbutton" href="http://www.youtube.com/embed/VGiGHQeOqII" id="youtube" rel="width:800,height:447" title="Youtube.com Video">Video Tour <span class="ion-ios-videocam buttonicon"></span></a>
What to expect image code:
<div style="position: relative;">
<img src="images/expect_below.jpg" style="position: absolute;" class="expectbelowimage" alt="expectbelow" data-sr="enter bottom, over 1s, move 200px" />
<img src="images/expect_top.jpg" class="expecttopimage bottomright_shadow" alt="expectbelow" data-sr="enter right, over 1s, move 300px" /></div>
Horizontal Accordion:
This area consists of the S5 Horizontal Accordion menu published to custom_2 position. Modules must be published to the following positions, s5_ha_1, s5_ha_2, s5_ha_3, s5_ha_4. Ion Icons must be enabled for the icons to appear. The available Ion Icons can be found: http://ionicons.com/
Example code for one of the slides:
<span class="s5accordionicson ion-map"></span>
<h3>Camping</h3>
Quisque gravida mi nec ligula interdum vel malesuada elit
<div style="clear:both;"></div>
<a style="float:none" class="readon" href="">Read More</a>
Get Your Tour Tickets:
There is a custom HTML module that is published to the top_row2_1 position. The background image is controlled under the Main/Layout tab in the template configuration. There is a second custom HTML published to the top_row2_2 position. Scroll reveal must be enabled for the transition effect in the top_row1_2 position.
Tour Tickets Title (top_row2_1):
<div class="module_round_box titleleft_noline">
<h3 class="s5_mod_h3"><span class="s5_h3_first">Get your </span><span class="s5_h3_last">Tour Tickets</span></h3>
</div>
Tour Tickets Button (top_row2_2):
<div class="rtlbutton"><a class="readon">Purchase Here</a></div>
Our History:
There is a custom HTML module that is published to the top_row3_1 position. Scroll reveal must be enabled for the transition effect in the top_row3_1 position. There is a second custom HTML published to the top_row3_2 position. The background image is controlled under the Main/Layout tab in the template configuration.
Our History Images (top_row3_1):
<div style="position: relative;"><br />
<img src="images/ourhistory1.jpg" style="position: relative;" class="historybottomimage" alt="our history" data-sr="enter bottom, over 1s, move 200px" />
<img src="images/ourhistory2.jpg" class="historyimagealign bottomright_shadow" alt="our history" data-sr="enter left, over 1s, move 300px" /></div>
Our History Text (top_row3_2):
<span class="firstcharacter2">A</span>m sit amet elit a velit hendrerit efficitur eleifend eget dui. Aenean pretium nibh sapien, ut ullamcorper felis convallis nec. Ut posuere quis just<br /><br />o sed commodo. Sed luctus quam quis nisi porta, sed dictum justo porttitor. Vivamus porta mollis pellentesque. Duis sem lorem, pretium ut laoreet vel, finibus at nunc. Curabitur posuere nisi justo, vel malesuada elit euismod nec.<br /><br />
<div class="rtlbutton"><a class="readon">Read more</a></div>
Masonry Module:
This module is published to the above_columns_1 position, and does not use any custom HTML. The images are defined as the article's intro image in the settings of the article. The background image is controlled under the Main/Layout tab in the template configuration. For setup instructions for S5 Masonry please visit: https://www.shape5.com/documentation/Joomla/Extensions/S5-Masonry
Countdown and today at the park:
The countdown timer will show up in the bottom_row1_1 position. You can change all the settings for it in the Theme Specific area of Vertex. There is a custom HTML module published to the bottom_row1_1 position with a module class suffix of "titleleft". The title (next meteor shower expected in class=hide_580) of it includes a responsive hide class so that this module is hidden at 580 screen width when the countdown timer is also hidden. The module on the right is a standard Joomla newsflash module published to the bottom_row1_2 position with a class suffix of "titleright".
Countdown and today at the park:
The S5 Instagram Feed module is published to the custom_5 module position with a module suffix of "overlaytitle_right". Its set to show 6 images at once with a fixed height of 250.
Lodge with Us:
There is a custom HTML module that is published to the bottom_row2_1 position with a module suffix of " titlecenter". Scroll reveal must be enabled for the transition effects in this position. The background image is controlled under the Main/Layout tab in the template configuration.
Code:
<div class="s5_lodgecenter">
With over 1,000 rooms available you will have plenty of room to stay with us. We also have over 50 campgrounds available year round for those who prefer the outdoor life.
</div>
<br /><br /><br />
<div class="s5_lodgeimagewrap">
<div class="s5_lodgeleft">
<img src="images/lodging.jpg" class="" style="position: relative;" alt="lodging" data-sr="enter left, over 1s, move 300px" /></div>
<div class="s5_lodgeright">
<img src="images/camping.jpg" class="" style="position: relative;" alt="camping" data-sr="enter right, over 1s, move 300px"/></div>
<div class="overlay_outer two s5_lodgevideo bottomright_shadow" style="position:absolute;margin:-28px auto 0;">
<div class="overlay_inner">
<div class="overlay_hover_outer">
<div class="overlay_hover_inner2">
<div class="overlay_centered">
<a href="http://www.youtube.com/embed/VGiGHQeOqII" id="youtube" rel="width:800,height:447" title="Youtube.com Video" class="s5mb s5_videoicon ion-android-arrow-dropright"></a>
<span class="s5_highlightfont fontsized">
View a quick tour of our<br>
<strong>lodging</strong> and <strong>campgrounds</strong>
</span>
</div>
</div>
<div class="overlay_hover_inner">
</div>
<img src="/attractions/images/lodgingvideo.jpg" alt="lodging video" >
</div>
</div>
</div>
<div style="clear:both;"></div>
</div>
S5 Quick Contact Popup and Controller:
The S5 Quick Contact is heavily customized to work with this template for reservations. Along with the module there is a controller area, which allows the user to first select a few inputs and then those inputs are passed into the S5 Quick Contact module to complete the form and submit it. That controller is shown below: .
When the button in the controller area is clicked the S5 Quick Contact opens in an overlay screen that covers the site. You can also open the S5 Quick Contact by adding onclick="s5_custom_7_open()" to any element. Click on the Reserve Now button below for an example.
Reserve Now
Setup Process:
1. Publish the S5 Quick Contact module to the custom_7 position to all pages. This will not actually show on the page, this position is only contained in the overlay area that covers the site when triggered. Configure the module as desired.
2. Publish the controller code to any module position in a custom html module, on the demo it is published to custom_3 position.
<div id="s5_quick_contact_controller"><a class="readon" onclick="s5_custom_7_open()">Check Availability</a></div>
3. In the template configuration you need to define which fields from the S5 Quick Contact module that you would like to show in the controller area. Enter the number of the fields you would like to show separated by commas. For example if I want to show the second, fifth and seventh fields, I would enter 2,5,7 in this field.

4. If you would like to add a button that opens the overlay area you can simply add onclick="s5_custom_7_open()" to any element. The Reserve Now button shown above uses the following code:
<a onclick="s5_custom_7_open()" class="readon">Reserve Now</a>
Quote:
This is a custom HTML module published to the custom_6 module position.
Code:
<div style="margin: 0 auto; text-align: center; color: #fff; width: 52%;" class="s5_highlightfont">
<h2 style="font-weight: normal;">“Look deep into nature and then you will understand everything better”</h2>
- Albert Einstein<br /><br /><br /></div>
Footer Area:
The logo pulls from your main site logo. This can be disabled from the Vertex theme specific area. The address and time info is a custom HTML module published to the bottom_row3_1 position, the code is below. The 2 menus are standard Joomla menus published to the bottom_row3_2 and bottom_row3_3 positions. In the bottom_row3_4 position is published the S5 MailChimp module.
Code:
<div class="s5_address_wrap">
<div class="s5_address_left"><span class="addressicon ion-ios-location"></span></div>
<div class="s5_address_right"><span class="address_wrap"> 1000 Ross Municipal Drive <br>Bigtownville, CO 15237 <br><br> </span></div>
<div style="clear: both;"></div>
<div class="s5_address_left"><span class="addressicon ion-ios-clock"></span></div>
<div class="s5_address_right">10 a.m. to 5:30 p.m. daily<br/>
Closed December 25</div>
<div style="clear: both;"></div>
</div>
Social Icons:
The social icons are not shown on this demo but they are stylized for position custom_8 and they do come with the site shaper. They are a custom html module. Ion Icons must be enabled for the icons to appear.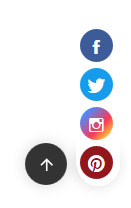
Social Icons:
<a href="" class="social_icon ion-social-facebook"></a>
<a href="" class="social_icon ion-social-twitter"></a>
<a href="" class="social_icon social_icon ion-social-instagram-outline"></a>
<a href="" class="social_icon ion-social-pinterest"></a>
<a href="" class="social_icon ion-social-twitter"></a>
<a href="" class="social_icon social_icon ion-social-instagram-outline"></a>
<a href="" class="social_icon ion-social-pinterest"></a>